
Raspberry Pi Remote Access: SSH & VNC Guide
Can you truly harness the power of a Raspberry Pi without the constraints of a physical monitor? The answer is a resounding yes, unlocking a world of remote access and headless operation through the magic of VNC and SSH, revolutionizing how we interact with these versatile mini-computers.
The Raspberry Pi, a marvel of modern technology, has captured the imaginations of hobbyists, educators, and professionals alike. Its compact size, affordability, and versatility make it an ideal platform for a vast array of projects, from home automation and media centers to robotics and embedded systems. But what if you want to control your Raspberry Pi from afar, without the need for a bulky monitor, keyboard, and mouse? This is where the power of remote access comes into play.
One of the simplest and most effective methods for remote control on a Raspberry Pi is through the use of Virtual Network Computing (VNC). If you are using Raspberry Pi OS, a VNC server is preinstalled, meaning that you only need to enable it to begin. VNC allows you to view and control your Raspberry Pi's desktop environment remotely, as if you were sitting right in front of it. Another option is to expose SSH or VNC on your Raspberry Pi over the open internet, within a VPN, or using an external service like RealVNCs Cloud VNC Viewer. In addition to these options, Raspberry Pi Connect is a free screen sharing and remote shell service provided by Raspberry Pi, which is another way to go about using your Raspberry Pi without a monitor.
For those seeking a deeper dive into the world of Raspberry Pi and remote access, consider the following table which provides key information on the core concepts and technologies discussed:
| Concept | Description | Key Features |
|---|---|---|
| SSH (Secure Shell) | A network protocol that enables secure remote access to and control of your Raspberry Pi over a network. |
|
| VNC (Virtual Network Computing) | A graphical desktop sharing system that allows you to view and control your Raspberry Pi's desktop remotely. |
|
| Raspberry Pi Connect | A free screen sharing and remote shell service provided by Raspberry Pi. |
|
| Headless Operation | Running the Raspberry Pi without a connected monitor, keyboard, or mouse. |
|
| SSH Tunneling | Creating a secure connection through SSH to forward network traffic, such as VNC. Tools like SSHuttle can handle SSH tunneling. |
|
For further information on the Raspberry Pi, consider visiting the official Raspberry Pi Foundation website: Raspberry Pi Foundation
Enabling SSH is often the first step in setting up remote access. SSH, or Secure Shell, is a network protocol that provides a secure way to access and control your Raspberry Pi over a network. It works by encrypting the communication between your computer and the Raspberry Pi, protecting sensitive information like your login credentials. SSH utilizes port 22 by default. In older versions of Raspbian, the SSH server was enabled by default. However, after the November 2016 release, the SSH server was disabled by default for security reasons. This means that you need to enable it manually.
- Hdhub4u Free Movies Risks Everything You Need To Know
- Hdhub4u Free Movie Downloads Streaming Guide Watch Now
With SSH enabled, you can access the Raspberry Pi's terminal remotely. This is incredibly useful for running commands, managing files, and configuring the system. However, sometimes you need access to the graphical desktop as well. This is where VNC comes in. VNC allows you to view and control the Raspberry Pi's desktop environment, just like you would if you were sitting in front of it. The easiest way to get remote control is by using VNC on your Raspberry Pi. If you use Raspberry Pi OS, VNC is preinstalled, so you only have to enable it to get started.
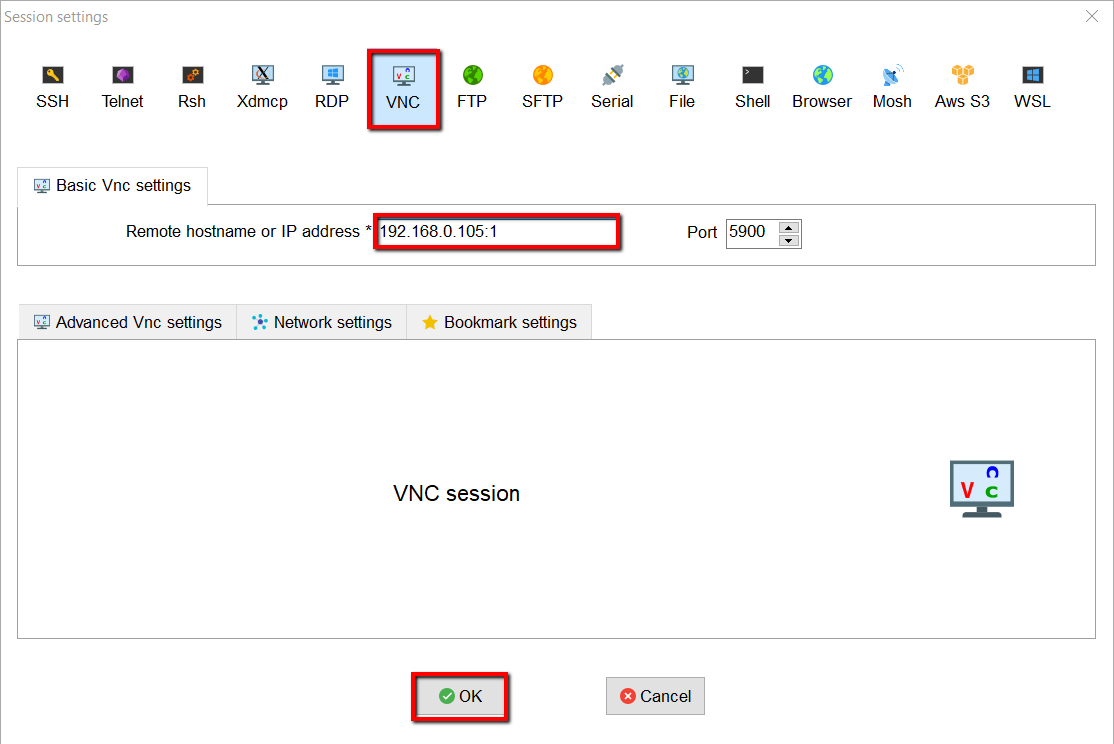
One popular method is to use TightVNC, running on the Pi, and a VNC client on your PC. This approach is straightforward and provides a reliable remote desktop experience. There are examples of this approach that can be found in the wiki.
For accessing the Raspberry Pi terminal remotely, enabling SSH on the Raspberry Pi is crucial. This remote command-line access can be enabled via the Raspberry Pi software configuration tool. To launch it, open the Raspberry Pi terminal and type the appropriate command. Once you hit enter, the configuration screen should appear, allowing you to enable SSH and configure other system settings.
Let's delve into the practical steps of setting up VNC and SSH for remote access. If you are new to Raspberry Pi, starting a project can be exciting. Imagine you have a Pi 3 and you're building an infrared night vision remote-controlled car with an infrared Pi camera from Amazon. Everything is working great, except you can't see the camera preview over VNC or SSH. The key to resolving this lies in understanding how to configure your VNC server to display the camera feed.
One of the initial steps is to ensure that SSH is enabled. This allows you to connect to your Raspberry Pi remotely and perform tasks like installing software or configuring settings. SSH is a fundamental building block for remote access.
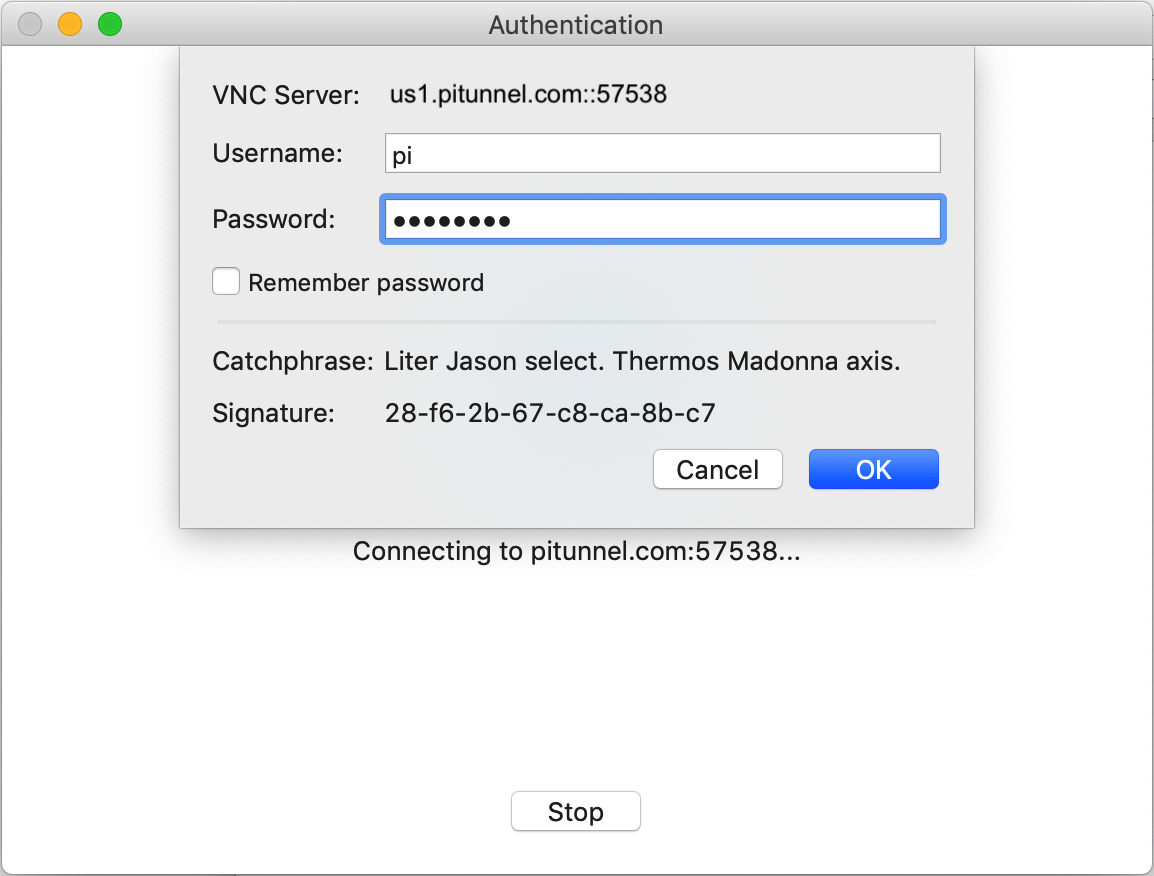
Once SSH is set up, you can install and configure a VNC server on your Raspberry Pi. RealVNC offers a cloud-based VNC viewer, which can be accessed from anywhere with an internet connection, providing a secure and convenient way to remotely access your Pi. You can expose SSH or VNC on your Raspberry Pi over the open internet, within a VPN, or by utilizing an external service like RealVNCs Cloud VNC Viewer.
A note of caution: When setting up VNC, be mindful of security. Consider using a strong password for your VNC server and only allow access from trusted networks. Using a VPN or SSH tunneling can also help enhance the security of your VNC connection.
To configure VNC effectively, you may need to set the resolution. This ensures that the remote desktop display matches the resolution of your monitor. There are several guides available on how to set VNC resolution on Raspberry Pi, which can be found online or on the Raspberry Pi Foundation's official website. With VNC properly set up, you can share your desktop screen with VNC on Linux and access your graphical environment.
Another important aspect of the process is automating the startup of VNC and SSH. This ensures that you can access your Raspberry Pi remotely whenever you need to, without having to manually enable the services each time. Configuring SSH and VNC to start automatically on boot makes remoting into your Pi a breeze. There's one last thing left in our headless Raspberry Pi setup: Otherwise, you'd have to enable the VNC server on Raspberry Pi through the SSH client every time we need to access the desktop environment.
For enhanced security and remote access over the internet, you'll also want to install SSH (Secure Shell) on your Raspberry Pi. This secure protocol encrypts the connection between your computer and the Raspberry Pi, preventing eavesdropping and unauthorized access. Many users prefer to log in to Raspberry Pi through the SSH client, like Movaxterm.
You have the option to expose SSH or VNC on your Raspberry Pi over the open internet, within a VPN, or using an external service like RealVNCs Cloud VNC Viewer. Alternatively, Raspberry Pi Connect offers a convenient, free screen sharing, and remote shell service.
If you encounter a black screen after booting your Raspberry Pi, it might be due to several factors, including incorrect VNC server settings or display configuration issues. Troubleshooting steps usually include verifying the VNC server is running, and ensuring the correct resolution is set. Additionally, a thorough examination of the display configuration settings is warranted.
For those seeking a more hands-on approach, consider using tools like SSHuttle, which can handle SSH tunneling. SSH tunneling is a powerful technique for securely forwarding network traffic through an SSH connection. For accessing the Raspberry Pi graphical desktop and applications, VNC often works better than X forwarding over SSH. With VNC, you can see and control the graphical interface directly, making it easy to run applications and interact with the system.
As far as it can be understood, only x11vnc works with the real desktop and should work over an SSH tunnel too. But, if you are trying not to mess up your system, installing VNC software other than RealVNC will replace it. Now, your VNC server will start with the proper resolution whenever your Pi boots!
In the process of setting up and configuring remote access, youll encounter valuable insights into the Raspberry Pi's potential. For instance, you'll learn how to set up a VNC server and client on Ubuntu Linux. Remote command-line access to the Raspberry Pi via SSH can be enabled through the Raspberry Pi software configuration tool.
In essence, mastering remote access to your Raspberry Pi opens up a world of possibilities. It allows you to control your Pi from anywhere, regardless of whether you have a monitor, keyboard, and mouse connected. Whether you're a hobbyist, a student, or a professional, the ability to access your Raspberry Pi remotely is an invaluable skill.
Article Recommendations
- Watch Now Telugu Movies More On Netflix Jio Others
- Carl Thomas Dean Dolly Partons Husband Passes Away

Detail Author:
- Name : Amy Lang
- Username : hagenes.marcia
- Email : christop.johnston@gmail.com
- Birthdate : 1991-12-16
- Address : 99090 Odie Ville Apt. 939 West Kiera, ID 08002
- Phone : +1 (434) 372-0656
- Company : McGlynn and Sons
- Job : Manufacturing Sales Representative
- Bio : Animi dignissimos dolores id adipisci ducimus. Nobis commodi aperiam nisi et sed cupiditate. Non non autem molestiae architecto laborum harum.
Socials
twitter:
- url : https://twitter.com/ctromp
- username : ctromp
- bio : Ex et esse fugit qui necessitatibus libero eos. Necessitatibus enim quia dolor perspiciatis. Blanditiis dolorem dolorem ut nemo nam ut veritatis quam.
- followers : 6997
- following : 1646
instagram:
- url : https://instagram.com/casimer_official
- username : casimer_official
- bio : Adipisci eum ut enim nam incidunt necessitatibus. Ad iste sunt qui dolor laborum.
- followers : 287
- following : 46
linkedin:
- url : https://linkedin.com/in/casimer_xx
- username : casimer_xx
- bio : Occaecati odio deserunt dolorum officia dolor et.
- followers : 4832
- following : 1961
