
Raspberry Pi Remote Access: A Complete Guide
Can you truly unlock the boundless potential of your Raspberry Pi from anywhere in the world? The answer is a resounding yes, and it's surprisingly easier than you might think.
The ability to access your Raspberry Pi remotely, whether it's across town or across continents, opens up a universe of possibilities. From controlling your smart home devices to accessing files and running complex applications, the potential is limited only by your imagination. This article will guide you through the process of setting up remote access, transforming your compact computer into a powerful tool accessible from anywhere with an internet connection.
Before we delve into the practical steps, let's understand why remote access to your Raspberry Pi is so advantageous. The advantages are numerous and compelling, making it an indispensable feature for various applications.
- Hdhub4u Your Guide To Free Movie Streaming Downloads
- Explore Hdhub4u Free Movies Features Risks Alternatives
| Feature | Description |
|---|---|
| Remote Monitoring and Control | Keep tabs on your Raspberry Pi's performance, monitor sensor data, and remotely control connected devices, all from a distance. |
| File Access and Management | Access and manage your files stored on the Raspberry Pi, regardless of your location. This is particularly useful for NAS servers, allowing you to retrieve documents, photos, and videos. |
| Software Development and Testing | Develop and test software applications on your Raspberry Pi remotely. This is invaluable for projects involving embedded systems, IoT devices, and other remote-controlled applications. |
| Home Automation Control | Control your home automation system from anywhere with an internet connection. Manage lights, appliances, and other smart home devices, ensuring comfort and convenience. |
| Project Debugging and Maintenance | Remotely debug and maintain your projects, saving time and effort by eliminating the need for physical access to the Raspberry Pi. |
For more detailed information on the benefits and applications of remote access, you can refer to the official Raspberry Pi documentation: Raspberry Pi Documentation.
Setting up a Network Attached Storage (NAS) server with a Raspberry Pi is a practical and rewarding project. It offers a cost-effective solution for storing and accessing your files from various devices within your network and, crucially, from outside it.
The fundamental components required for this endeavor are straightforward: a Raspberry Pi (3B+ or 4, for optimal performance) and an external hard drive (preferably an SSD for faster speeds). Consider a photo by Jainath Ponnala on Unsplash for a visual representation of this setup, and we'll explore the steps.
- Tamilblasters Risks Alternatives Facts You Need To Know
- Hdhub4u Stream Download Movies For Free What You Need To Know
Step 1: Gathering the Necessities
Your first task involves ensuring you have the essential hardware. A Raspberry Pi (3B+ or 4) forms the core of your NAS server. The choice of Raspberry Pi model depends on your specific needs. For instance, if you anticipate heavy file transfers, the Raspberry Pi 4, with its gigabit Ethernet port and faster processing power, would be preferable. Additionally, you'll need an external hard drive or, better still, a Solid State Drive (SSD). The SSD's superior read and write speeds will significantly enhance your NAS server's performance.
The Challenges of Remote Access
Gaining access to your Raspberry Pi from outside your local network presents some hurdles. While accessing the Pi from within your home network is usually straightforward, things become more complicated when you try to connect from a different network. The primary obstacle is the network's firewall and router configuration.
One common approach to overcome these obstacles involves configuring the SSH (Secure Shell) daemon. You can modify the `/etc/ssh/sshd_config` file and forward the appropriate port (e.g., 2223) to the IP address of your Raspberry Pi. However, this is just one method, and there are various other tools and techniques available.
The core objective is to reach your Raspberry Pi from anywhere, whether you're using a Windows 7 or Windows 10 machine or accessing it from a mobile device. To achieve this, you'll need to address several critical requirements. Fortunately, the required hardware is minimal; many solutions rely primarily on remote desktop software.
Raspberry Pi Remote Access Requirements
The essential components needed to make remote access possible include:
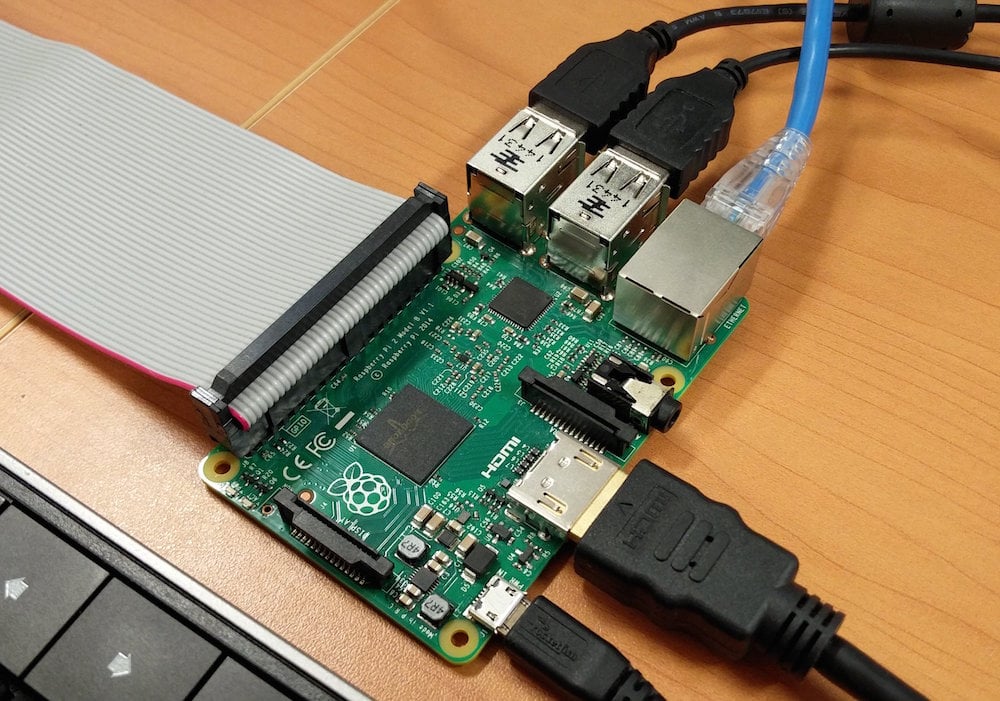
- Raspberry Pi with Internet Access: The Pi needs to be connected to the internet, ideally via an ethernet connection for speed and stability, though Wi-Fi will also work.
- A Router: Your router plays a crucial role in directing external traffic to your Raspberry Pi.
- Remote Access Software: This software enables you to connect to and control your Pi remotely (e.g., SSH clients, VNC viewers, or services like Raspberry Pi Connect).
The setup of a VPN (Virtual Private Network) can offer enhanced security, particularly when accessing from public networks. If you have a VPS (Virtual Private Server), you could set up a VPN server on it. Your Raspberry Pi can be configured to maintain a constant connection to the VPN, enabling you to access it using a VPN client from your laptop, smartphone, or other devices.
Troubleshooting Common Issues
Setting up remote access can be a learning process, and you may encounter challenges. One common issue is the inability to connect to your Raspberry Pi from an external network, even after defining a static IP address and configuring port forwarding. Ensure the port you've forwarded (e.g., 2223 for SSH) is correctly set up in your router's settings. Double-check that your firewall isn't blocking the connection and verify that your public IP address is correctly configured. Additionally, ensure that your Raspberry Pi's SSH daemon is running correctly.
Port Forwarding: The Gateway to Remote Access
The process of accessing your Raspberry Pi from outside your local network fundamentally involves setting up port forwarding. This is the crucial step that allows external traffic to reach your Raspberry Pi.
To set up port forwarding, follow these steps:
- Access Your Router's Admin Panel: Enter your router's IP address in a web browser. The IP address is typically something like 192.168.1.1 or 192.168.0.1, but it could vary depending on your router. If you don't know your router's IP address, you can often find it in your device's network settings.
- Log In: You'll need your router's username and password to log in. These are often found on a sticker on the router itself or in the router's documentation.
- Locate the Port Forwarding Section: The location of the port forwarding section varies between routers. Look for a section labeled "Port Forwarding," "Virtual Servers," or similar.
- Create a Port Forwarding Rule: You'll need to create a new rule. Within the rule, you'll specify the following:
- Service/Application Name: A descriptive name, such as "SSH" or "VNC".
- Protocol: TCP, UDP, or both (for SSH, it's generally TCP).
- External Port: The port you want to use to access your Raspberry Pi from outside your network. (e.g., 2223 for SSH, or the port for VNC).
- Internal Port: The port on your Raspberry Pi that the service is listening on (e.g., 22 for SSH, 5900 for VNC).
- Internal IP Address: The IP address of your Raspberry Pi on your local network (e.g., 192.168.1.100). You should have set a static IP address for your Pi to ensure it doesn't change.
- Save the Rule: Save the port forwarding rule.
By correctly configuring port forwarding, you're essentially creating a pathway for external traffic to reach your Raspberry Pi.
Alternative Solutions for Remote Access
While port forwarding is a standard method, other approaches offer simpler solutions or added security. These options can be especially useful for those new to networking or who need a more straightforward setup.
Using SSH and VNC:
One option involves exposing SSH or VNC on your Raspberry Pi over the open internet. This gives you direct access. You can also achieve this within a VPN, which offers added security. Alternatively, you can employ an external service such as RealVNC's Cloud VNC Viewer, which simplifies the process of remote access.
Raspberry Pi Connect:
Raspberry Pi Connect is a free screen sharing and remote shell service directly provided by Raspberry Pi. It simplifies the remote access process, reducing setup steps and technical knowledge needed.
The Ngrok Tool:
Ngrok is a powerful and easy-to-use tool that creates a secure tunnel to your Raspberry Pi, enabling remote access without requiring port forwarding. It requires minimal setup and works reliably. You can expose SSH or VNC services through this tool.
Accessing a Raspberry Pi From Outside Your Network: A Simplified Approach
Accessing a Raspberry Pi (or any home computer) from outside your home network normally involves network configurations and acquiring an IP address.
To remotely control your Raspberry Pi from any internet-connected device, consider these options:
- Expose SSH or VNC over the internet, within a VPN, or using cloud-based services.
- Use Raspberry Pi Connect, a free service for screen sharing and remote access.
CCTV and NAS Integration
Building a rudimentary CCTV system with a Raspberry Pi can be enhanced by integrating a NAS drive. The central Pi hub could be connected to the camera modules, and the NAS drive is used to store the CCTV footage. You can access it remotely, even when you are not at home. The NAS drive will also act as central repository for all video files, accessible from any device within the home network.
The 1995 Way (Static IP Address)
Setting up a static IP address for your home router through your ISP (Internet Service Provider) is a traditional approach that can be used. This gives a consistent IP address for your home network.
The Versatility of the Raspberry Pi
The Raspberry Pi's compact size and affordability belie its impressive capabilities as a versatile computing platform. They're often used for various projects and applications, including a remote-controlled system.
You can control a Raspberry Pi Pico W remotely using an HTML code and an IP address, enabling button-controlled LED lighting. This can be extended by providing internet access.
Why Access Raspberry Pi Remotely?
Remote access to your Raspberry Pi has many advantages that improve project workflows. It allows you to:
- Monitor and control IoT devices.
- Access files and run software from anywhere.
- Manage a home automation system.
- Debug and fix projects remotely.
Remote access to your Raspberry Pi grants you a range of benefits. It allows you to:
- Monitor and control IoT devices: Manage your connected devices remotely.
- Access files: Retrieve files stored on your Raspberry Pi from any location.
- Run programs: Launch and manage programs that run on your Pi.
To access your Raspberry Pi from outside your local network, you have to configure port forwarding.
Here's what you need to do:
- Go to your router's admin panel by entering its IP address in a browser.
- Locate the "port forwarding" section.
Whether you are accessing from a mobile phone, computer, or giving others access to your Pi from outside your network, you can experiment with IoT projects using your Raspberry Pi!
Article Recommendations
- Hdhub4u Unveiling The Risks Alternatives For Free Movies
- Carl Deans Passing Dolly Parton Mourns Her Husband Of 60 Years


Detail Author:
- Name : Dovie Kuhic
- Username : brenna31
- Email : aurelie.heaney@yahoo.com
- Birthdate : 1974-07-04
- Address : 5024 Maggio Lodge Apt. 513 North Tobymouth, MS 20790
- Phone : 1-253-742-8796
- Company : Kuhn-Hettinger
- Job : Housekeeping Supervisor
- Bio : Quo dicta repellat veniam et rerum. Et laborum sit et iusto eum fugit voluptatum. Distinctio dolorem doloremque sit quisquam odit velit qui.
Socials
linkedin:
- url : https://linkedin.com/in/emmie.anderson
- username : emmie.anderson
- bio : Similique eum voluptas reiciendis blanditiis.
- followers : 3594
- following : 2863
instagram:
- url : https://instagram.com/emmie_anderson
- username : emmie_anderson
- bio : Itaque sit perspiciatis ea rerum est. Ab ut omnis sint maiores et. Doloribus ut dolorum occaecati.
- followers : 6279
- following : 614
facebook:
- url : https://facebook.com/emmie3146
- username : emmie3146
- bio : Quia excepturi quis distinctio nam iste nihil.
- followers : 4612
- following : 1378
tiktok:
- url : https://tiktok.com/@eanderson
- username : eanderson
- bio : Iusto perferendis soluta ipsam temporibus.
- followers : 4906
- following : 2316
twitter:
- url : https://twitter.com/emmie.anderson
- username : emmie.anderson
- bio : Fugit nisi illum ut quia quidem exercitationem enim. Odit sint sapiente et vero aliquid fuga facilis. Quia pariatur incidunt asperiores quibusdam.
- followers : 4567
- following : 70
