
Raspberry Pi Remote Access: SSH, VNC & More!
In an age defined by connectivity, how can you seamlessly bridge the gap between your physical projects and the digital world? Remote access to your Raspberry Pi offers a gateway to unparalleled control and flexibility, transforming your projects into dynamic, accessible hubs of innovation.
The ability to remotely access your Raspberry Pi unlocks a realm of possibilities, allowing you to monitor, manage, and interact with your projects from virtually anywhere. Whether you're a seasoned developer, a curious hobbyist, or an educator looking to empower students, the power of remote access is undeniable. This article delves into the essential methods and tools, ensuring you can harness the full potential of your Raspberry Pi, regardless of your location.
The Raspberry Pi Foundation, a beacon of innovation in the realm of single-board computers, consistently strives to simplify and secure access to its devices. Today, several methods provide a robust and user-friendly approach to connecting to your Raspberry Pi remotely. From the foundational Secure Shell (SSH) protocol to the more visually oriented Virtual Network Computing (VNC) and the newly introduced Raspberry Pi Connect, the options cater to a range of needs and technical proficiencies. Let's explore these avenues, equipping you with the knowledge to choose the best remote access solution for your unique requirements.
| Feature | Details |
|---|---|
| Technology Focus | Remote access to Raspberry Pi devices. |
| Primary Objective | To provide users with secure and efficient methods to access their Raspberry Pi from remote locations. |
| Target Audience | Developers, hobbyists, educators, and anyone who needs to interact with their Raspberry Pi projects remotely. |
| Key Methods | SSH (Secure Shell), VNC (Virtual Network Computing), Raspberry Pi Connect, and alternative solutions like NoMachine, TeamViewer, and RDP. |
| SSH Overview | Allows remote access to the command line of the Raspberry Pi. SSH is disabled by default. |
| VNC Overview | Provides graphical remote access, enabling a full desktop experience. It is included by default on Raspberry Pi OS. |
| Raspberry Pi Connect | A tool from the Raspberry Pi Foundation that provides secure GUI access from a web browser. |
| Alternative Solutions | NoMachine, TeamViewer, and RDP offer alternative remote access methods, each with its own features and setup requirements. |
| Networking Requirements | The Raspberry Pi must be connected to a network, either via Ethernet or Wi-Fi, to enable remote access. |
| File Transfer | Demonstrated the use of the `scp` command to copy files to and from the Raspberry Pi. |
| Camera Interface | Explained the process of enabling the camera interface through the Raspberry Pi configuration settings. |
| Ease of Access | Emphasizes the importance of simple browser-based and user-friendly access methods. |
| Security Measures | Focuses on the importance of secure remote access solutions. |
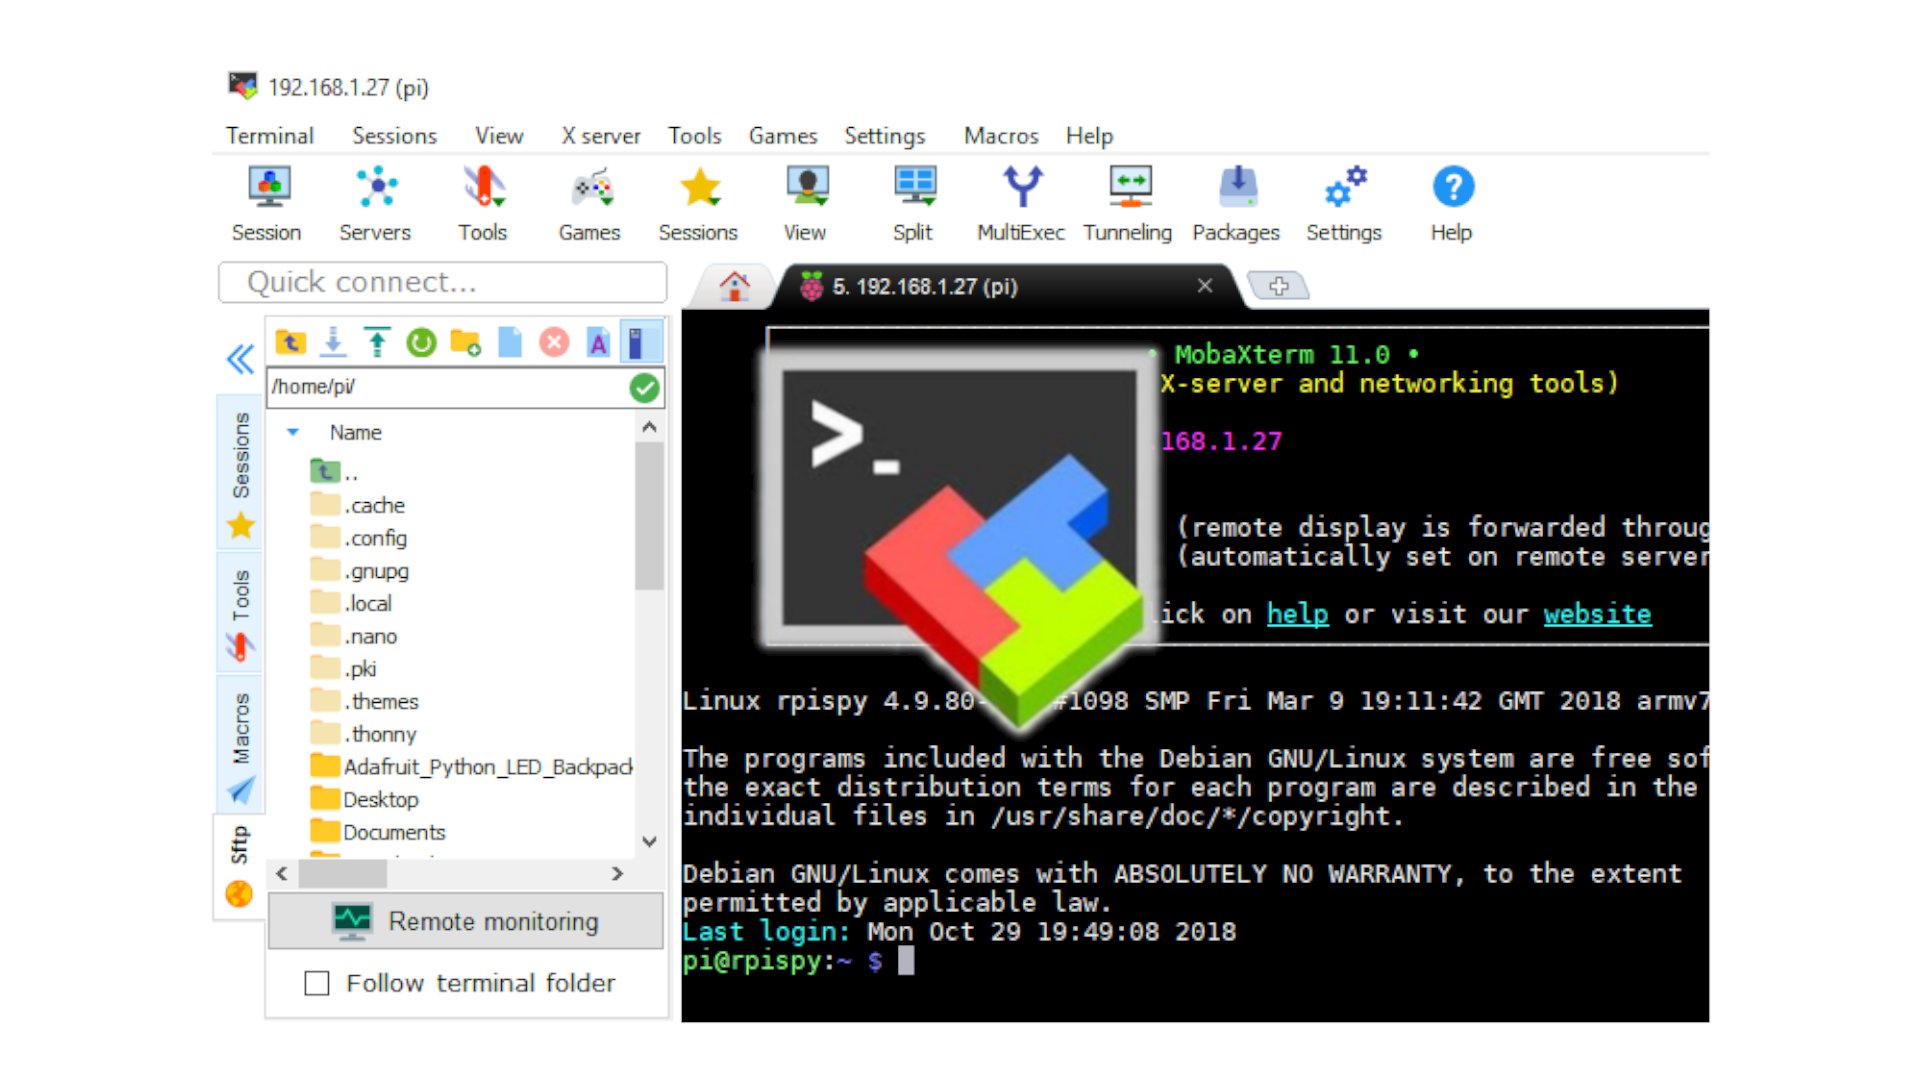
One of the most fundamental methods for remote access is through the Secure Shell (SSH) protocol. SSH offers a secure way to remotely access the command line interface of your Raspberry Pi from another computer. It's a robust, tried-and-true solution perfect for those who prefer a text-based interaction or need to perform command-line operations. The beauty of SSH lies in its simplicity and security. However, it's crucial to remember that SSH is disabled by default, so enabling it is the first step toward remote access. For more detailed information about SSH, you can consult the official SSH documentation.
To enable or disable remote terminal access to your Raspberry Pi using SSH, you'll typically need to access the Raspberry Pi's configuration settings. This might involve connecting a keyboard and monitor directly to the Raspberry Pi initially, or, if you have enabled SSH previously, you can remotely connect via another computer on the same network. Once in the configuration settings, look for an option to enable or disable SSH, and follow the prompts to make the necessary changes. The process is usually straightforward, ensuring a balance of security and accessibility.
For users who prefer a graphical interface, Virtual Network Computing (VNC) is an excellent choice. VNC allows you to connect to your Raspberry Pi's desktop and interact with it as if you were sitting right in front of it. This approach is perfect for projects requiring a visual component or for users who are more comfortable with a graphical user interface. VNC is typically included by default on Raspberry Pi OS, making it readily available without additional installations. However, you will need a VNC viewer installed on your computer or smartphone. After setting up the VNC server on your Raspberry Pi, you can then use the VNC viewer to connect to your device.
- Free Movie Streaming Your Guide To Hd Hub 4u More
- Is Hdhub4u Safe Risks Alternatives For Streaming Movies
The process of setting up VNC involves enabling VNC server functionality on your Raspberry Pi. This can usually be done through the Raspberry Pi configuration tool, accessible through the graphical user interface or the command line. The tool allows you to configure VNC server settings, such as the password required to connect, and select the resolution of the remote session. Once the VNC server is properly configured and started, you can enter the username and password for the raspberry pi login via your viewer. The session should then start, and you should see your raspberry pi desktop.
More recently, the Raspberry Pi Foundation has introduced Raspberry Pi Connect. This tool offers a streamlined approach to secure, remote GUI access to your Raspberry Pi directly from any modern web browser, assuming your Raspberry Pi is running the latest Raspberry Pi OS. The ease of use of Raspberry Pi Connect is a major draw, allowing users to connect from virtually anywhere with an internet connection and a web browser. With Raspberry Pi Connect, we now have an easy way to connect to a raspberry pi from anywhere, using a simple web browser. This is part of the Raspberry Pi Foundation's broader strategy to simplify remote access and make the Raspberry Pi accessible to a wider audience. However, while it simplifies access, it still necessitates a network connection, either wired or wireless, to be established by the user.
Raspberry Pi Connect provides secure access to your raspberry pi from anywhere in the world. However, while it simplifies access, it still necessitates a network connection, either wired or wireless, to be established by the user. Using Raspberry Pi Connect typically involves setting up the tool on your Raspberry Pi and then accessing it through a web browser on your connecting device. The setup process is designed to be user-friendly, typically guiding you through a series of steps to configure the connection securely. The interface of Raspberry Pi Connect aims to mimic the local experience, providing a user-friendly way to interact with your Raspberry Pi's desktop remotely.
Beyond SSH, VNC, and Raspberry Pi Connect, other viable alternatives offer various features and capabilities. Nomachine, TeamViewer, and RDP (Remote Desktop Protocol) are popular choices. These tools often offer features such as file transfer, remote printing, and more, depending on the particular application. Each has its own advantages and disadvantages, but these choices expand the landscape of remote access and cater to specific needs.
When it comes to alternative solutions, each has its own unique approach. Nomachine, for example, is optimized for speed and performance, making it a good choice for bandwidth-intensive applications. TeamViewer is known for its ease of use and cross-platform compatibility. RDP, often available by default in Windows environments, provides seamless integration with Microsoft systems. While these solutions vary in their specific implementation, they all share the goal of making remote access straightforward and effective.
Connecting your Raspberry Pi to a network is a prerequisite for remote access. This can be achieved in two primary ways: via a wired connection using an Ethernet cable or wirelessly using Wi-Fi. An Ethernet connection typically provides more stable and consistent performance, while Wi-Fi offers flexibility. To connect via Ethernet, simply plug the cable into your Raspberry Pi's Ethernet port and ensure that your network assigns an IP address. For Wi-Fi, you'll need to configure the wireless networking settings, usually via the Raspberry Pi's configuration tools, by entering the network's SSID (name) and password.
Once your Raspberry Pi is connected to a network, you'll need to determine its IP address. This address is the key to accessing your Raspberry Pi remotely. You can typically find the IP address through your router's settings or by using command-line tools within your Raspberry Pi's operating system. Knowing the IP address is fundamental to establishing a remote connection, whether you're using SSH, VNC, or another remote access method.
To access your Raspberry Pi remotely, you'll need to connect your Raspberry Pi to a network, and a way to access the Raspberry Pi over that network. Creating a tunnel to access VNC remotely requires forwarding the port VNC uses from your local network, through your router, and eventually to your raspberry pi. Remote access is the answer. With a remote access system, you can use another computer to access the command line or even the entire gui screen. Understanding everything about the Raspberry Pi, stop searching for help all the time, and finally enjoy completing your projects.
The command-line tools and system configurations can provide a significant boost in your familiarity with remote access. Enabling the camera interface on your Raspberry Pi, for instance, requires accessing the Raspberry Pi configuration settings. In the configuration tool, navigate to the "interface options" section, and select the "camera" option to enable it. To copy a file named myfile.txt from your personal computer to a users home folder on your raspberry pi, run the following command from the directory containing myfile.txt, replacing the placeholder with the username you use to log in to your raspberry pi and the placeholder with your raspberry pis IP address:
To copy a file to your Raspberry Pi, you can leverage the `scp` (secure copy) command. This command is essential for transferring files securely between your personal computer and your Raspberry Pi. It utilizes SSH for a secure connection, encrypting the file transfer to protect your data. Use this command from your computer's terminal or command prompt, replacing the placeholder with your Raspberry Pi's IP address and the placeholder with your Raspberry Pi login's username. This command is an easy way to share the file with your Raspberry Pi.
Once you've mastered remote access techniques, the possibilities for your Raspberry Pi projects are vast. You'll have the ability to create, understand, and improve any Python script for your Raspberry Pi, and to master the platform as a whole. It's about more than simply connecting to a remote device. It's about gaining an understanding and control of your projects, no matter where you are.
Article Recommendations
- Stray Kids Facts Info More Your Ultimate Guide
- Hdhub4u Free Movie Downloads Piracy Risks What You Need To Know

Detail Author:
- Name : Lambert Connelly
- Username : ewell.carter
- Email : weber.tracy@dach.com
- Birthdate : 1984-09-11
- Address : 1863 Demetrius Gateway Yostborough, FL 57245
- Phone : +1.484.919.6218
- Company : Hartmann-Schowalter
- Job : Material Movers
- Bio : Et tenetur vel et non. Ipsum fugit sit velit a aut est aut occaecati. Quia tempore omnis autem quam facilis.
Socials
linkedin:
- url : https://linkedin.com/in/linda_id
- username : linda_id
- bio : Quasi aperiam quo quam et veritatis.
- followers : 3034
- following : 1011
twitter:
- url : https://twitter.com/linda.reynolds
- username : linda.reynolds
- bio : At nam dolorum et tenetur modi. Aperiam error provident quaerat dolor. Vel quidem nam et officiis tempora. Animi dolore a reiciendis quia nobis dolore.
- followers : 252
- following : 847
facebook:
- url : https://facebook.com/lindareynolds
- username : lindareynolds
- bio : Molestias vel cum eligendi earum alias. Quo enim est ut in quis aut dolores.
- followers : 127
- following : 1802
